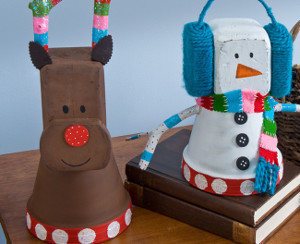
Clay Pot Christmas Cuties
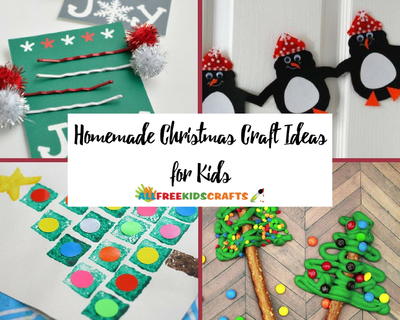
Make this Christmas holly jolly with Christmas craft ideas for kids that Santa will love. Clay Pot Christmas Cuties are the perfect additions to this year's holiday decorations. They're a blast to make, and they're absolutely adorable when they're complete. Kids' Christmas crafts aren't always put-together enough to display, but these cuties will attract crowds. Give them as gifts or keep the preciousness all for yourself.

Materials:
- Apple Barrel ® Colors - Pool Blue, 2 oz.
- Apple Barrel ® Colors - Pink Parfait, 2 oz.
- Apple Barrel ® Colors - Bright Red, 2 oz.
- Apple Barrel ® Colors - White, 2 oz.
- Apple Barrel ® Colors - Black, 2 oz.
- Apple Barrel ® Colors - Nutmeg Brown, 2 oz.
- Apple Barrel ® Colors - Leaf Green, 2 oz.
- Apple Barrel ® Colors - Pewter Grey, 2 oz.
- Apple Barrel ® Colors - Pumpkin Orange, 2 oz.
- 6” Terracotta pots
- 4”-4x4 wood posts
- 2” Pieces of landscape timber
- White chenille stem
- Electric blue yarn
- Small wood circles
- Felt scraps
- White thread
- Hot glue
- Ice glitter
- Small sticks
- Spray sealer
- Sandpaper
- Adhesive brown felt
Instructions:
Snowman-
1. Hot Glue the wood block to the bottom of the pot.
2. Base-coat the clay pot and the wood block with Pewter Grey. Base-coat same pot and block with White. When they are dry lightly sand to create a distressed look.
3. Paint the two wood blocks with Pool Blue. When they are dry, hot glue the yarn to them as shown. Hot glue the chenille stems to the tops of the yarn wrapped wood blocks. Wrap the yarn around the stems adding a few hot glue dots to secure the yarn.
4. Paint the wood circles Black and add White dots to create the look of buttons.
5. Paint the bottom of the pot Bright Red. Add White dots and sprinkle glitter on the dots before the paint dries.
6. Paint the sticks White. Add Pool Blue stripes and Bright Red polka dots. Lightly spray the arms with sealer and sprinkle with glitter.
7. Stitch the felt scraps with the white thread and add yarn to the ends.
8. Paint the eyes Black and the carrot nose Pumpkin Orange.
9. Hot glue the earmuffs, scarf, arms, and buttons to the snowman.
Reindeer-
1. Hot Glue the wood block to the bottom of the pot.
2. Base-coat the clay pot and the wood block with Black. Base-coat same pot and block with Nutmeg Brown. When they are dry lightly sand to create a distressed look.
3. Paint the wood block with Black and then Nutmeg Brown. When they are dry, hot glue to the face of the reindeer as shown.
4. Paint the wood circle Bright Red and add White dots.
5. Paint the bottom of the pot Bright Red. Add White dots and sprinkle glitter on the dots before the paint dries.
6. Paint the sticks White. Add Pool Blue, Bright Red, Pink Parfait and Leaf Green stripes. Lightly spray the arms with sealer and sprinkle with glitter. Hot glue to the head as shown.
7. Stick two pieces of felt together and cut into the shape of an ear. Hot glue to the top of the head
8. Paint the eyes and mouth with Black.
Read NextEasy Craft Stick Snowflake Ornaments
Your Recently Viewed Projects
Thanks for your comment. Don't forget to share!
Report Inappropriate Comment
Are you sure you would like to report this comment? It will be flagged for our moderators to take action.
Thank you for taking the time to improve the content on our site.