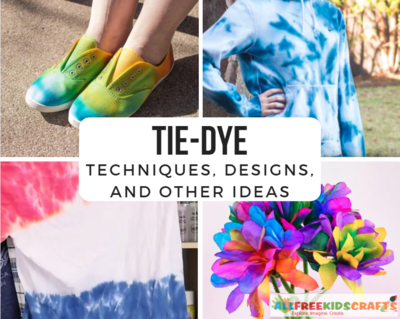
Easy Tie Dye Tips and Step-by-Step Instructions

Tie Dyeing is a classic craft that has been popular since the 70s and has worked its way into summer camp programs, class projects, and more. However, there are many who still don't know how tie dyeing works which is why we've gathered for you these Easy Tie Dye Tips and Step-by-Step Instructions. There's no need to search the internet for cool tips and tricks for tie-dyeing because we've gathered them all for you right here in this handy list of tips and instructions. All you'll need to do is figure out what item, pattern, and colors you want to tie dye with. These tie dye instructions are sure to cover all your need-to-knows to make an extra groovy shirt.
From shirts to tote bags, we've got you covered on how to tie dye. You'll have much more fun with your first tie dyeing experience once you feel prepared and have an idea of what steps to take. There's no need to worry because tie dyeing is a great art form and craft rolled into one. These crafts are great group kids' crafts that you can do at parties or during summer camp. Tie dyeing can create great wearable crafts that the children can wear all summer long. You can also find plenty of easy tie dye patterns and crafts on our site once you've mastered these tips and instructions.
Easy Tie Dye Tips and Step-by-Step Instructions
If you have a vision of your ideal tie dye design but don't know how to make it a reality, don't sweat it. With these instructions and tips, you'll have the funkiest tie dye design in town. People will be coming to you for advice on how to tie dye once you've mastered these amazing tips and tricks.
Step-by-Step Instructions
-
Wash the fabric before getting started. Don't get too hasty and immediately start dyeing. You'll want to make sure that the item you're planning on dyeing is clean of dirt and other stains that could affect your design.
-
Soak in soda ash solution and wring out. Fill a tub with the soda ash solution, and let your shirt or item soak until it is fully saturated. This can take up to a half an hour if needed. Afterward, wring the item of excess solution. You could even put it on the spin cycle in the washing machine to get rid of as much excess as possible. However, the shirt needs to remain wet for the dye to react with the shirt.
-
Fold or tie fabric in desired pattern. There are tons of different patterns you can choose from. Twisting and tying fabric in certain ways will result in different final designs. For some tying patterns, check out our tie dye crafts. Use rubber bands or string to hold folds together in the shape you want.
-
Protect yourself and your clothes. Depending on the kind of dyes you use, it's imperative that you protect your skin and the clothes that you wear. You can wear old clothes or wear a trash bag or rain poncho while dyeing. If you're using powdered dye, make sure to use a face mask to prevent inhalation.
-
Mix dye with water. See your dye's directions on the mixing ratios of water and dye.
-
Begin dyeing! Add the colors of dye you want to the regions you've designated by tying or twisting.
-
Wrap item in plastic and let sit. Once you've finished dyeing the item, the fabric and dye need to sit for 24 hours. Place the item in a plastic bag and leave it for a day. However, you'll want to make sure it stays wet, so don't leave it in the sun.
-
Unwrap and rinse. After 24 hours, the item need to be rinsed in cold water and soap a few times to remove any excess dye from the fibers.
-
Time to dry. You can either put your item in the dryer or hang dry in the sun or in your bathroom.
Tips and Tricks
-
Use a screen or grill over a trashcan or tub while dyeing so that the excess dye can drip through. You won't want the dye to puddle underneath the shirt and dye one of the sides a strange mixture of all the colors.
-
Be mindful of which colors you combine. It's always safe to follow this pattern when starting out dyeing for the first time: red, orange, yellow, green, blue, red, etc.
-
However, there is no wrong way to tie dye, so have fun and get creative!
-
When tie dyeing with large groups of people, put everyone's dyed item in a plastic bag while it's sitting and label with the person's name and at what time the item should be washed and rinsed.
-
Use painter's tape to add writing or stripe patterns to an item before you start dyeing.
-
Try using rubber bands to tie a shirt to a plastic cup for some really cool circular patterns.
-
Put dye into a spray bottle for an airbrushed look. Try out this technique with this How to Tie Dye with Markers craft.
-
Use an eyedropper or tiny syringe for more intricate designs and to have easier control of the dye in a smaller area.
-
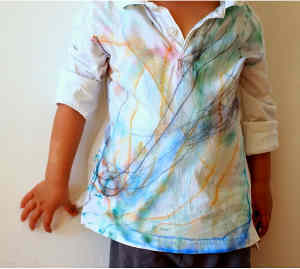
Use sharpies or markers for an alternative way to tie dye clothing and other items.
What are your favorite color combinations?
Read Next100+ Free Printable Crafts for Kids