Paper Plate Snowman Mask
Learn how to make a paper plate mask that doubles as a photo booth prop with this easy video tutorial.
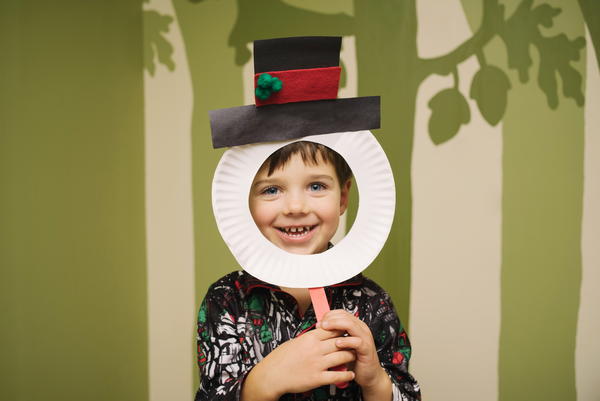
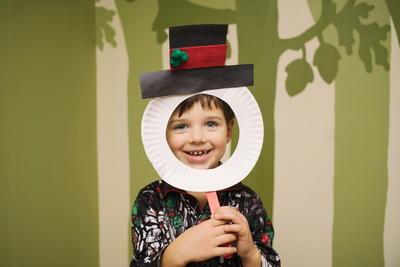
The Paper Plate Snowman Mask is the perfect last-minute craft the kids will enjoy this winter. With Christmas coming, there is no shortage on great winter kids crafts that are quick, easy to make, and perfect for parties. This paper plate mask requires minimal supplies— most of which you can find around your home! This easy snowman craft will not only keep your kids occupied; but, it is also a great Christmas craft to really let them use their creativity. Turn this Paper Plate Snowman Mask into a DIY photo booth prop for an in-home shoot that can be used to create fun and funky pictures for the holidays. Say "goodbye" to boring Christmas cards!
Estimated CostUnder $10
Time to CompleteUnder an hour
Main MaterialPaper

Age GroupPreschool & Kindergarten, Elementary School
Materials List
- Paper Plates
- Large Red Popsicle Sticks
- Red Felt Sheet
- Black Construction Paper
- Multi Colored Pom Poms
- Scissors
- Craft Knife
- All Purpose Glue
How to Make a Paper Plate Mask (Snowman)
Instructions:
-
Take your paper plate and cut out the middle, then cut out the base of your snowman hat from your construction paper.
-
Cut a strip of felt about an inch wide, and one inch longer than the length of the top of your snowman hat, so the edges can wrap around the back.
-
Glue the felt around your hat and glue three pom poms in a cluster on the top corner of the felt strip. Allow to dry.
-
Now, glue the hat onto the top of the plate, and glue a red Popsicle stick onto the bottom of the plate. Allow to dry.
-
For added support glue an additional popsicle stick on the back from the tip of the hat down to the paper plate.
-
Once dry kids can draw, paint, add glitter, whatever they please!

