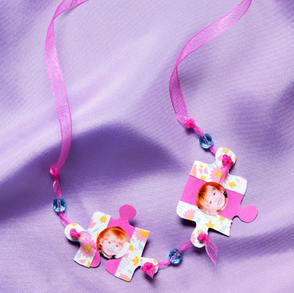
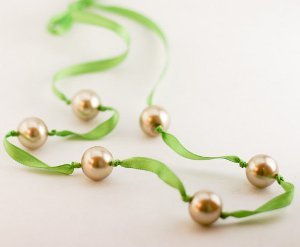
Puzzle Piece DIY Necklace
Make sure Mom is dressed to impress on Mother's Day with this unique Puzzle Piece DIY Necklace. Custom homemade Mother's Day gifts like this one are the best way to express appreciation for Mom. Kids can make a puzzle piece charm for each member of the family, so when Mom wears her new DIY necklace out and about on Mother’s Day, she can show off the most important pieces of her life to everyone she sees.

Materials:
- Aleene's® Crystal Clear Acid Free Tacky Spray™
- Pencil
- Hole punch – 1/16”
- ¼” Ribbon
- Scissors
- Card stock – pink
- Wood skewer
- Photos
- Paper – coordinating pink print
- 3 Beads – medium size – aqua
- Pattern
Instructions:
- Cut two strips of pink cardstock about 3”x 6”. Lay one piece on spray area with the right side down. Layer this piece on top of the remaining piece. Cut out the puzzle patterns and place them on the pink cardstock pieces, then trace and cut out.
- Using the same puzzle piece patterns, trace onto the back of the printed-paper and cut out. Cut a ½” strip out of center area on both pieces. Refer to photo. Spray the back of each piece with Aleene’s® Crystal Clear Tacky Spray™ and attach to the corresponding area of the pink puzzle pieces. Tip: It is helpful to use a skewer to hold down the small pieces when spraying so they won’t move with the force of the spray.
- Punch holes on each side in the protruding areas.
- Cut the faces from your photos to fit the puzzle pieces. Spray the back of each one with Tacky Spray™ and place in the center of the puzzle pieces.
- Cut a piece of ribbon and trim one of the ends into a long sharp point and thread one of the beads to the center of the ribbon. Place each end of the ribbon through the holes on one side of each puzzle piece and tie a knot at each end to secure. Trim excess ribbon.
- Cut 2 pieces of ribbon about 15” long. Thread one end of ribbon through a bead and then through the outer hole on one of the puzzle pieces. Tie in place as before and tie another knot just past the bead to keep it in place. Repeat process for the other side. Tie the ribbon ends together to the length desired.
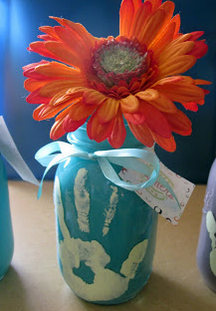
Read NextMother's Day Mason Jar Vase