Nifty Duct Tape Book Cover

Are you tired of all those boring textbook and notebook covers? Then you'll definitely want to make a Nifty Duct Tape Book Cover for all your kid's school books this year! Duct tape is incredibly versatile and it will protect notebooks and textbooks like no other. There's a reason duct tape is known to fix just about anything. Your kids will love this school supplies craft because they'll get to personalize all their notebooks any way they want. Just pick up some decorative duct tape and get ready to be amazed by these awesome notebook decorations!
Estimated CostUnder $10
Primary TechniqueGeneral Crafts

Age GroupElementary School, Pre-Teens, Teens
Materials List
- Fun Duct Tape (two rolls that match)
- School Books
- Tape Measure
- Ruler
- Non-stick Scissors (8")
- Cutting Mat (24" x 36")
Instructions
-
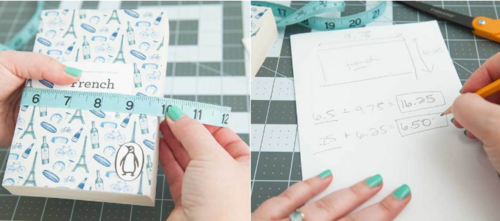
Using a tape measure or ruler, measure the height and complete length of the book to be covered. Add exactly 6 1/2” to the length and exactly 1/4” to the height. This is how large the book cover needs to be.
-
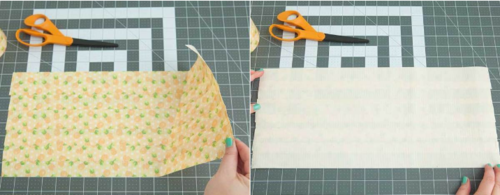
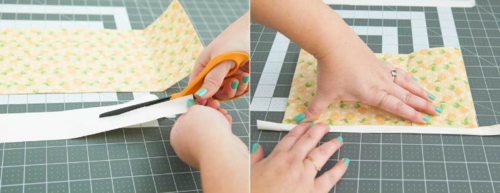
Using a large cutting mat and non-stick scissors, start to create the “duct tape fabric” by laying down strip after strip, at your desired measurement. Overshoot your measurements a little so you can cut the “fabric” down to fit. Each strip needs to cover at least 1/3” of the prior strip. It’s your choice to do the strips vertically or horizontally. Non-stick scissors are a must for this project as they cut through duct tape quickly and easily.
-
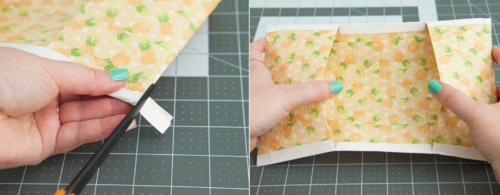
Once you have the first “fabric” side complete, gently peel it up from the first strip and turn over.
-
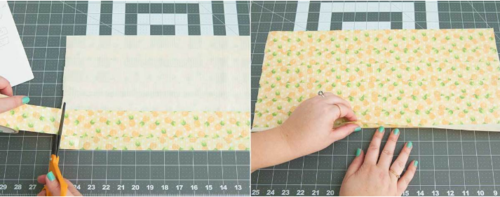
Now create the backside of the “fabric” by laying more staggered strips of tape across the tape that’s facing up. When finished, fold over the excess tape at the end.
-
Trim any excess "fabric" to reach your determined book cover size, using a ruler and the cutting mat as your guides.
-
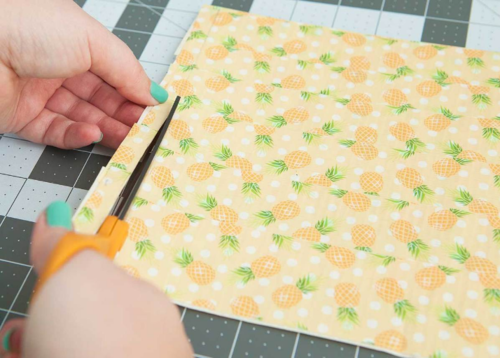
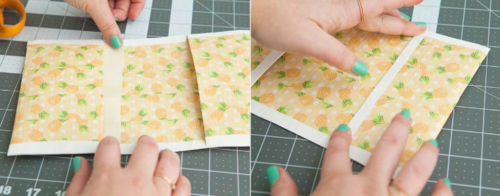
Hold the book up to the “fabric” to find where it needs to fold around the book front and back. Fold the “fabric” around the book and crease to mark.
-
Cut pieces of of duck tape in half to make the decorative edge of the book cover. Place the folded book cover on top of the strip and wrap up to secure. Create decorative edges on both the top and bottom.
-
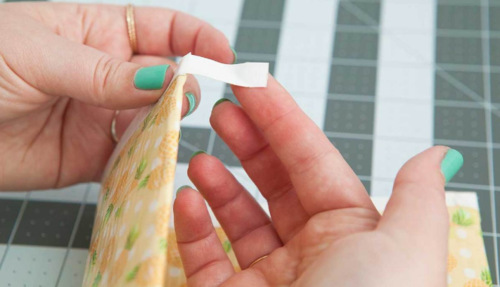
Trim the excess tape from the edges and make a notch at each of the 4 inside corners.
-
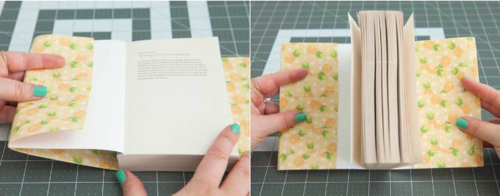
Now create the decorative edge for the inside flap of the cover by again cutting a strip in half and adhering to each side.
-
Cut extra little pieces of duct tape to reinforce all corners and edges, as they will see the most wear.

Read NextMason Jar Cellophane Lanterns