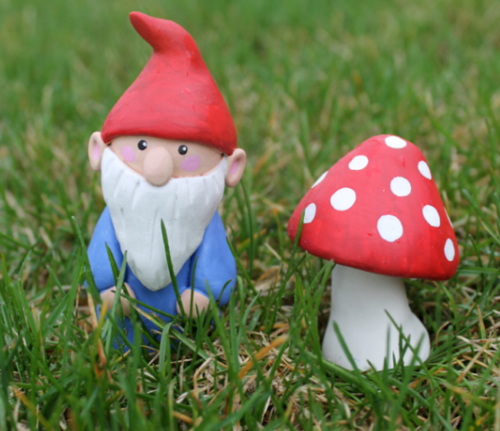
Clay Mushroom and Garden Gnome Accents

If you're itching to get your little ones interested in the wonderful world of gardening, then try making these Clay Mushroom and Garden Gnome Accents. Creating the perfect garden isn't just about flowers and vegetables, it's also about the accents and decorations. Make a beautiful garden you'll love to come home to with a mischievous mythical creature and an adorable mushroom decoration. After all, no garden is complete without a friendly garden gnome! Your kids will no doubt love making these fun clay garden crafts!
Estimated Cost$21-$30
Time to CompleteWeekend project
MaterialsClay, Paint
Primary TechniqueGeneral Crafts

Age GroupElementary School, Pre-Teens, Teens
Materials List
- Original Sculpey®
- Americana Acrylic Paints: white, black, blue harbor, baby pink, flesh, tomato red
- Paintbrush
- Toothpick
- Oven for clay baking
- Baking sheet for clay
- Sandpaper: Wet/Dry 400 grit (optional)
Getting Started
-
Polymer clay may stain. CLAY MAY DAMAGE UNPROTECTED FURNTURE OR FINISHED SURFACES. DO NOT USE polymer clay on unprotected surfaces. We recommend working on the Sculpey clay mat, wax paper, metal baking sheet, or disposable foil. Start with clean hands and work surface area. Knead clay until soft and smooth. For best results, clean your hands in between colors. Shape clay, pressing pieces together firmly. Bake on oven-proof glass or metal surface at 275 degrees F (130 degrees C) for 15 minutes per ¼” (6mm) thickness. For best baking results, use and oven thermometer. DO NOT USE MICROWAVE OVEN. DO NOT EXCEED THE ABOVE TEMPERATURE OR RECOMMENDED BAKING TIME. Wash hands after use. Baking should be completed by an adult.
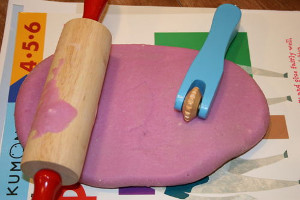
Begin by preheating oven to 275 degrees F (130 degrees C). Test temperature with oven thermometer for perfectly cured clay. For best results, condition all clay by running it through the Clay Conditioning Machine for several passes on the widest setting. Fold the clay in half after each pass and insert the fold side into the rollers first.
Gnome Instructions
-
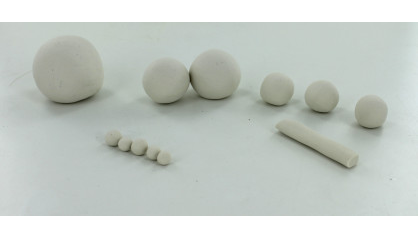
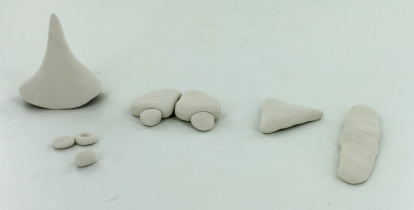
Condition your clay until soft and pliable. Roll out the following: Roll a large ball 1 ½” diameter approximately for the body. Roll one 1” ball for the head. Roll one ¾ to 1” sized ball for the gnome’s hat. Roll three ½” ball for the arms and beard. Roll a snake that is approximately 2” long and ¼” thick for the hair. Roll 5 tiny balls 1/8” to ¼” in size for the nose, ears, and hands. These are all the parts you will need to assemble your gnome.
-
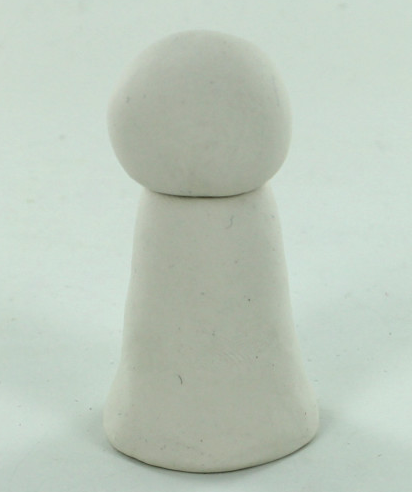
Take the largest ball and roll into a log shape rolling one end a bit thinner than the other so that it becomes a bit of a cone shape but still flat on the thinner end so that you can press the head on top. Press your 1” sized ball on top of your cone shape. You now have your head and body.
-
Next you will make the arms. Take two of your ½” balls and flatten and shape each into a rounded triangular shape. Press these on to either side of the body with the pointed end at the top and smooth clay around the shoulder area to secure onto the body. Use two of the tiny balls, flatten a bit and press on for hands at the base of each arm. Take your 2” snake and flatten. Wrap this around the base of the gnome’s neck right where the head and body meet. Trim any excess so that you have space to place your beard on the front of the face. The hair wraps half way around the head. Press to secure. Using your last ½” sized ball, flatten and shape into a triangle shape for the beard. Press onto the front of the face down where the head meets the body. Smooth the sides of the beard and the hair together. Using a toothpick makes some lines along the front of the beard and the hair for texture. Take a tiny ball and shape into an oval. Press this on for the nose right in above the beard in the center. Roll two more tiny balls into ovals. Using the end of your paintbrush make an indentation in each and press on the sides of the head for the ears.
-
Using your ¾ “ sized ball, press your finger in the center and start to make the hat by using the pinch pot technique. Press the sides with your fingers to thin the sides and make it wider. Make the end pointed. Keep pinching and then checking to see if your hat fits your gnomes head. This make take a few trys. Once it fits, press the hat onto your gnome’s head. Smooth any rough edges. Place on baking sheet for baking.
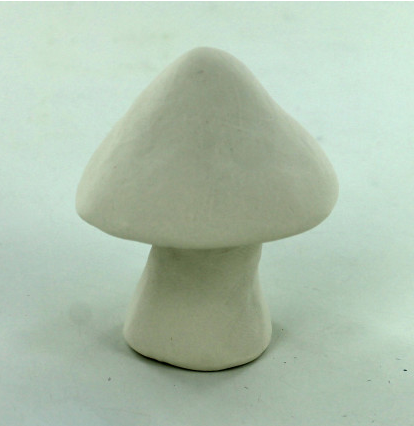
Mushroom Instructions
-
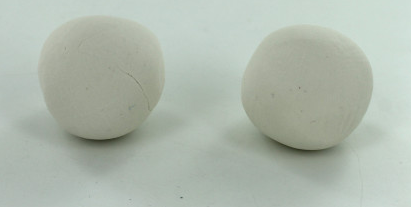
Roll two balls approximately 1 ¼” in diameter.
-
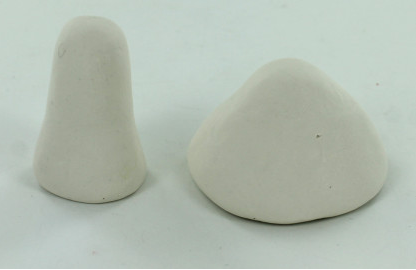
Roll one of your 1 ¼” sized balls into a log shape. Press the edges of one end to make them fan out a little bit and round the other end. This is the stem of your mushroom. Apply the pinch pot technique to your second ball by pressing one finger into the center of your ball and then pinching the edges to create a little bowl shape. Continue pressing and shaping your mushroom top until it is the right size.
-
Press top onto the stem. Make sure it is standing well and secure. If it is lobsided it can tip and fall while baking in the oven. Place onto your baking sheet with your completed gnome. Bake according to package directions and allow to cool.
Optional
-
Optional: Once your pieces are cool you can lightly sand them with wet/dry sandpaper if they have rough edges or bumps etc. If you choose to do this just soak your sandpaper for a few minutes first and then begin to gently sand your pieces rinsing under running water from time to time until you reach your desired smoothness. Now you are ready to paint! Keep in mind that you may need two coats on some parts, especially the body, hat and mushroom top. Start by painting the face, ears and hands with the flesh colored paint. Next paint the body of the gnome blue. Next paint the gnome’s hat and mushroom top red. Next paint the gnome’s hair and beard white. Paint white spots on your mushroom top. Lastly paint two black eyes and pink cheeks on your gnome. Leave mushroom stem it’s natural white color.
Read NextNo Nonsense No Bake Clay Dough