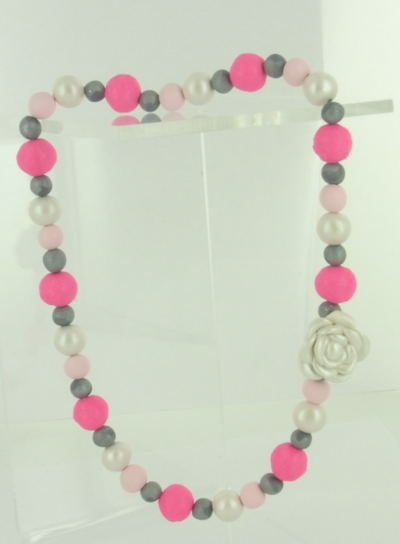
Pretty Princess Clay Bead Necklace

It's a popular to pastime for young children to play dress-up and you can make a Pretty Princess Clay Bead Necklace to add to your child's collection of accessories. This lovely DIY necklace is made from clay beads and you'll learn how to make a gorgeous rose embellishment for your beautiful necklace as well. You can even make a clay necklace for a princess Halloween costume that will be much prettier than any princess accessories from a store! This wonderful necklace is bound to inspire your little one's imagination and dreams of castles, dragons, and knights in shining armor.
Estimated Cost$11-$20
Time to CompleteIn an evening
MaterialsClay
Primary TechniqueJewelry Making

Age GroupPreschool & Kindergarten, Elementary School
Materials List
- SculpeyIII
- Sculpey Clay Tool Starter Set, set of 3
- Pearl Mica Powder
- Paint brush
- Craft knife
- 20" stretchy stringing cord
- Clear, fast-drying glue
- Scissors
Getting Started
-
Polymer clay may stain. CLAY MAY DAMAGE UNPROTECTED FURNITURE OR FINISHED SURFACES. DO NOT USE polymer clay on unprotected surfaces. We recommend working on the Sculpey clay mat, wax paper, metal baking sheet, or disposable foil. Start with clean hands and work surface area. Knead clay until soft and smooth. For best results, clean your hands in between colors. Shape clay, pressing pieces together firmly. Bake on oven-proof glass or metal surface at 275°F (130 °C) for 15 minutes per ¼" (6 mm) thickness. For best baking results, use an oven thermometer. DO NOT USE MICROWAVE OVEN. DO NOT EXCEED THE ABOVE TEMPERATURE OR RECOMMENDED BAKING TIME. Wash hands after use. Baking should be completed by an adult. Begin by preheating oven to 275 °F (130 °C). Test temperature with oven thermometer for perfectly cured clay. For best results, condition all clay by running it through the Clay Conditioning Machine for several passes on the widest setting. Fold the clay in half after each pass and insert the fold side into the rollers first.
Instructions
-
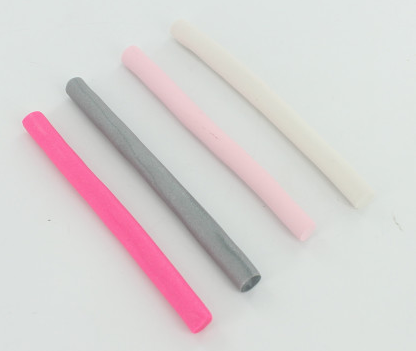
roll each of the colors into ropes 1/4" thick.
-
Cut nineteen 1/4" pieces from the Silver rope. Roll all of the pieces into balls.
-
Cut nine 3/8" pieces from the Ballerina rope. Roll all of the pieces into balls.
-
Cut nine 3/8" pieces from the Ballerina rope. Roll all of the pieces into balls.
-
Cut nine 1/2" pieces from the Pearl rope. Roll all of the pieces into balls.
-
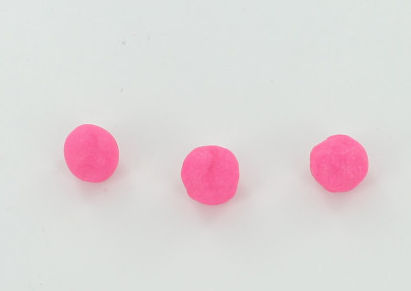
Cut nine 5/8" pieces from the Candy Pink rope. Roll all of the pieces into balls.
-
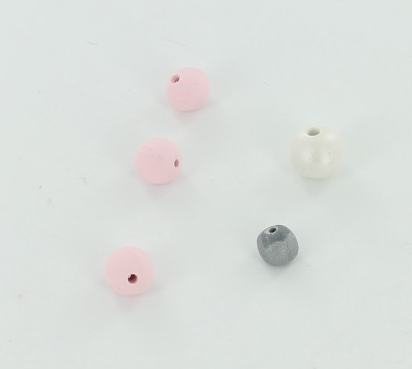
Put a little pearl mica powder in your hand and roll each of the pearl colored balls in it.
-
Lay the honeycomb sheet texture side up. Roll each of the Candy Pink balls all around on the texture sheet.
-
Poke holes in all of the balls using the needle tool.
-
Rose Bead
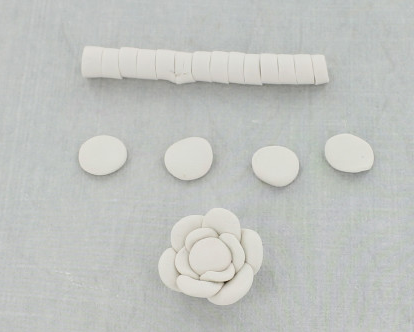
1. Roll a 1/4" thick snake of Pearl clay. Cut off two pieces from the snake that are about 1/8" thick. Cut each of those in half.
2. Cut off 10 more pieces from the snake that are 1/8" thick.
3. Using Pearl clay, make a ball 1/4" thick.
4. Smash the smaller slices flat. Press these around the outside of the ball to form petals.
5. Smash the larger slices flat. Press these in rows around the outside of the first row of petals. When you have all the petals in place, use a paintbrush to apply a thin layer of mica powder to the entire rose. Poke a hole in the back of the rose. -
Bake all beads according to directions above. When cool, string following the pattern in the finished photo. Tie an overhand knot and secure with super glue if desire.