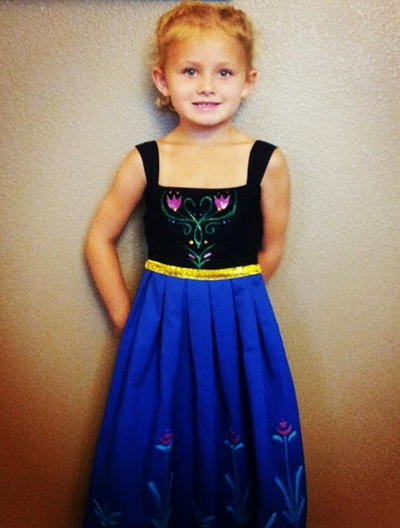
Princess Anna Dress Tutorial

If you have little ones who love Disney movies, then you're probably scrambling to find Frozen craft ideas. Use this Princess Anna Dress Tutorial to make the perfect costume for the little girl in the house who can sing every song word for word. DIY Halloween costumes like this aren't just for trick or treating - they can be worn any time your little one wants to feel like a princess. Grab your sewing machine, a simple dress pattern, and a few fabric paints, and get to work on one of the cutest homemade Halloween costumes around.
Estimated Cost$11-$20
Time to CompleteIn an evening
MaterialsFabric, Paint
Primary TechniquePainting

SeasonFall
HolidayHalloween
Materials List
- Tulip Dimensional Fabric Paints (Leaf Green, Poppin' Purple, Purple, and Gold)
- Simplicity pattern 1924
- Blue and black cotton, gold trim, matching thread and zipper (check pattern for specific yardage and details)
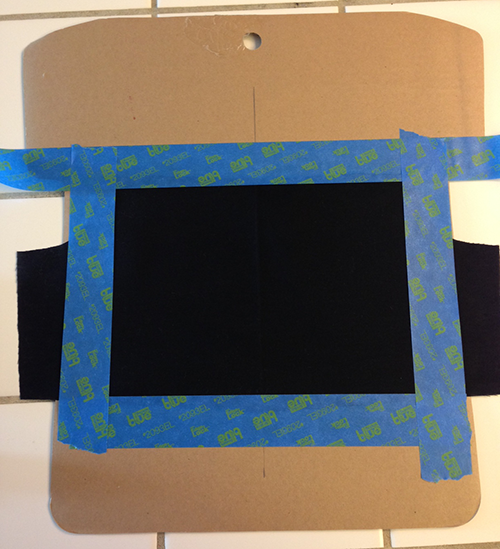
- Tulip T-shirt Form (or cardboard)
- Painters tape
- Water-soluble marker
- Ruler
Instructions
-
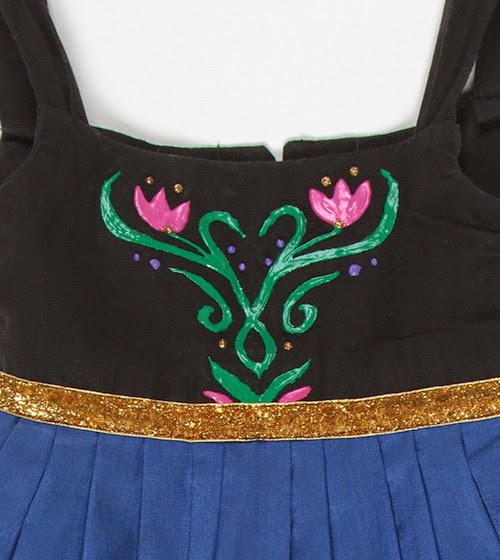
Using your pattern, cut your front chest pattern piece to size. Tape fabric to board using the tape.
-
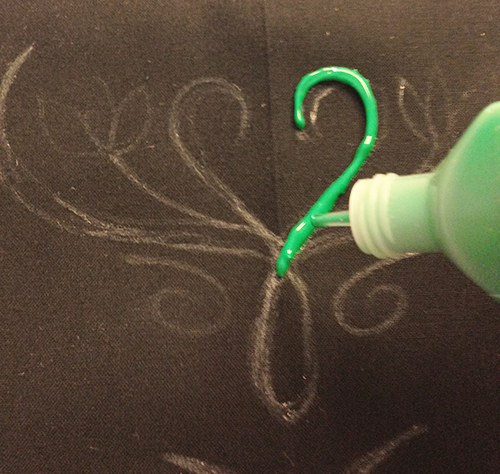
Using your water-soluble marker, center and freehand the front of Anna's dress design.
-
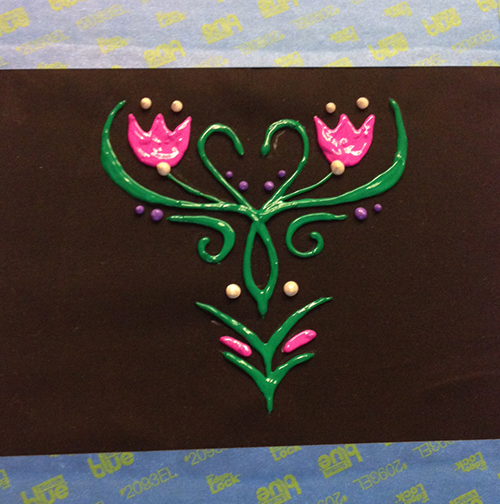
Use your leaf green 3D paint and outline leaves and branches.
-
Use the other colors to fill in the additional flowers, dots, and embellishments. Set aside to dry and move onto the skirt.
-
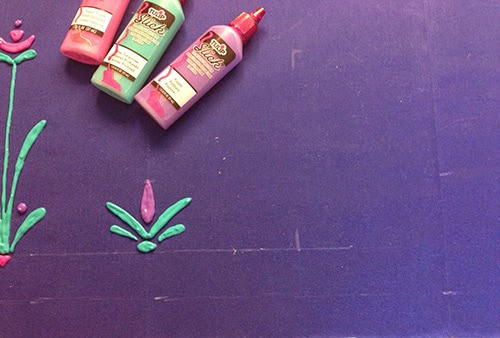
For the skirt, measure fabric into seven equal sections. Use marker and ruler to make lines. This will help you make sure the flowers are evenly spaced and approximately the same size.
-
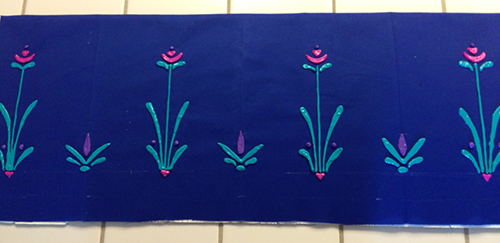
Use the marker to sketch the flowers, then retrace them with the paint. Work from left to right to prevent smudging. Start with the tall flower first, then the shorter flower second.
-
Repeat process until all flowers are completed. You should end with a tall flower and have a short flower in the center of the fabric. Allow time to dry. Once both top and bottom are dry, finish assembling your dress according to pattern instructions.
Read NextColor Burst Tee Design