Baked Butterfly Homemade Gift
Your kids will love transforming ordinary materials into extraordinary homemade gifts with this free kids' craft.

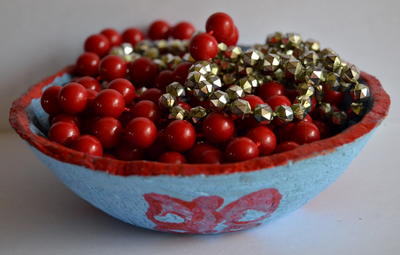
Your kids will love turning ordinary flour clay into extraordinary DIY decor with this Baked Butterfly Homemade Gift idea. Made with budget-friendly materials, this free kids' craft is a wonderful homemade gift idea for kids to make for Mom or Nana. Kids can enjoy modeling their own bowls out of clay and then have a blast decorating them with Mom's favorite spring colors.
These beginner pottery projects are also great for groups of kids, meaning they're an awesome choice for art classes. Art teachers can use this craft for kids to teach kids about building with clay and let little ones experiment with colors and textures. Whether created at home or at school, this fun art project for kids is the perfect way to introduce kids to the art of sculpture.
Estimated Cost$11-$20
Time to CompleteWeekend project
Primary TechniqueCeramics

Age GroupElementary School
Project TypeMake a Project
Materials List
- 1 cup flour
- ½ cup salt
- ½ cup hot water
- 1½ teaspoon vegetable oil
- Plastic bowl
- Small round stainless steel bowl
- Rolling pin and wooden plank
- Non-stick cooking spray
- Wooden spoon
- Plastic knife
- Food coloring (optional)
- Acrylic paint in the following two colors: powder blue and true red
- Paintbrush
- Small foam butterfly stamp
- Clear drying gloss spray varnish
- Newspaper to protect the working area
Instructions
How to Make Your Bowl
Note: Younger children should be supervised by an adult when creating this craft.
-
Combine flour and salt in the plastic bowl.
-
Add water and oil, and mix thoroughly with the wooden spoon.
-
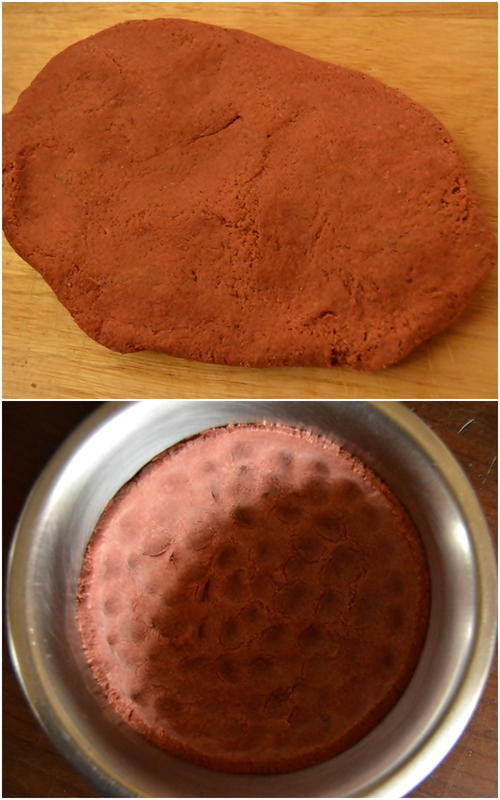
Allow the mixture to cool for 5-10 minutes until it is cool enough to knead. Optional: If adding food coloring, add it now. Even though the bowl will be painted, adding food coloring is a wonderful way for children to explore the effect of mixing certain colors together. In the example, terracotta brown was obtained by mixing red, blue, and yellow food coloring together.
-
Knead the clay for a few minutes until it becomes soft and pliable.
-
Roll clay to a thickness of about 5mm. Spray the inside of the stainless steel bowl with the non-stick cooking spray and cut a circle that would fit into the stainless steel bowl. Put the clay into the bowl.
-
Use finger tip to make small indents into the dough to add a textured appearance.
-
Check that edge of bowl is the same distance all around from the top of the stainless steel bowl, cutting off any extra clay to make the bowl neat.
-
Adult Supervision Required: Bake the bowl at 300° Fahrenheit (150° Celsius) for one hour. Carefully remove the clay bowl from the stainless steel bowl and bake the clay bowl for another two hours, or until it is hard and has dried completely.
-
Allow to cool down before decorating.
Decorating Your Bowl
-
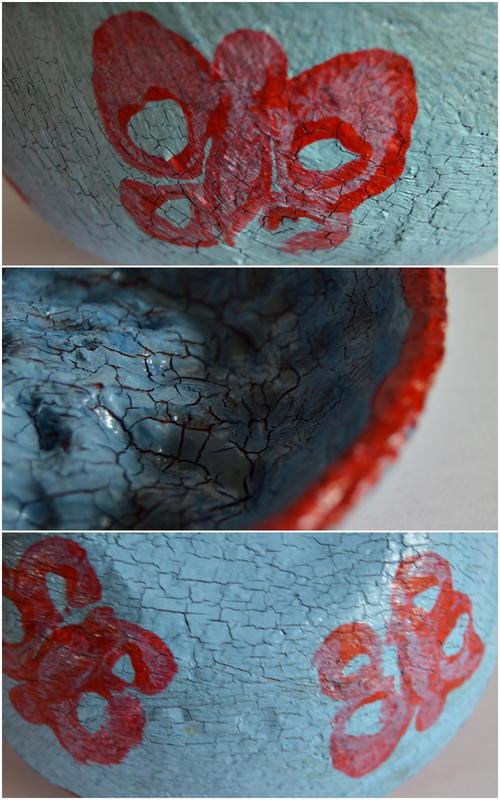
Use the powder blue paint to paint the outside of the clay bowl. Allow to dry for a few minutes. Once dry, the saltiness on the clay will cause the paint to have a cracked effect, which will add to the bowl’s appearance.
-
Turn the bowl over and paint the inside of the bowl, again using the powder blue paint. Allow to dry.
-
Use the foam stamp and the true red paint to add stamped butterflies around the outer edge of the bowl. Use the paint brush to apply an even layer of the paint onto the foam stamp pad. Transfer the image onto the bowl and then carefully lift the stamp. Continue adding more butterflies in the same way. Allow to dry thoroughly.
-
Use the true red paint to add a red border to the bowl and allow to dry.
-
Adult Supervision Required: Spray the pot with the varnish and allow to dry.
What crafts do your kids love sculpting with clay? Make sure to leave a comment below!
Read NextMosaic Melted Bead Bowl
Your Recently Viewed Projects
Thanks for your comment. Don't forget to share!
Report Inappropriate Comment
Are you sure you would like to report this comment? It will be flagged for our moderators to take action.
Thank you for taking the time to improve the content on our site.